The Process, Technique and Result

Gigapan Gigapixel photography process

Beyond Mega-pixels

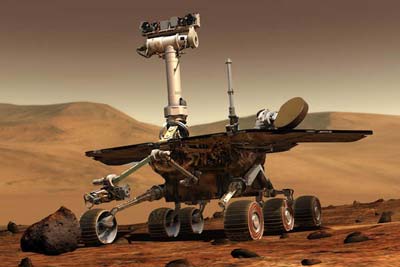
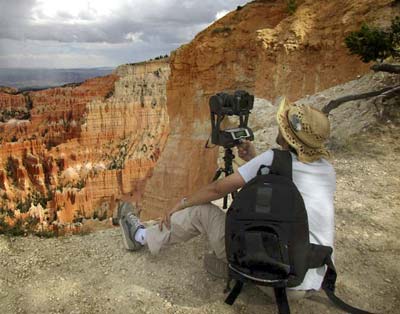
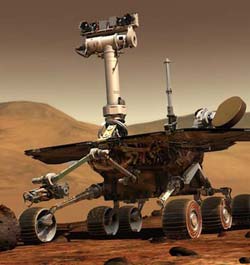
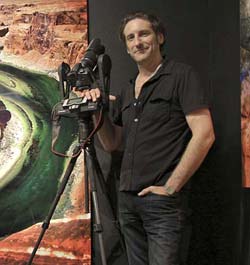
It has been said that 'photography' is not really a suitable term for the kind of work that Phil produces as the technique and work involved in producing these images is very different to simply clicking a shutter button. The equipment Phil uses was developed in part by NASA and is the same kind that is used on the Mars Rover, used to capture super high resolution images of Space phenomena. Many of the images are the product of hundreds of images joined together to produce an enormous photograph that is not measured in megapixels but gigapixels. The advantages of this are many and not only the sheer size, but the clarity and distortion free end result as each image involved in the panorama will always use the 'sweet spot' of the lens.

To learn more about how Phil goes about producing these spectacular images, see below and also see the Sarasota Style & Design article written about his work here.

Gigapan Gigapixel photography process

The First Stage - capturing the Scene

There are many stages to achieve the final image you see at the gallery and because of the sheer size of the images, each scene requires careful research and planning as it is not possible to simply take the shot in one go. Each picture is comprised of many images, sometimes over 100 which means that one shot can take well over 5 minutes therefore planning for light changes and movement is a key consideration especially as the best shots are taken at either dawn or dusk...a point of the day when ligh changes by the minute. The equipment involved is also cumbersome and heavy which can cause difficulties in particularly hot and difficult to reach areas.

Gigapan Gigapixel photography process

Stage 2 - Post Production

As mentioned earlier, each shot consists of many images and it is at this point that they are all put together. This takes an enormous amount of computing power as the resolutions and file sizes involved are huge. Once the initial piece is put together, it is compared to different exposures of the same image and any adjustments needed are done. The composite is then checked inch by inch for errors and focus. Any areas of the shot that do not meet required quality are re-composited from any existing spare shots. This quality checking is highly detailed work and done manually inch by inch. The final stage of the process is color correction and brightness adjustments. Again, this is done on sections of the image piece by piece as certain areas of the shot may require different adjustments. Once the final image is complete, it is then test printed many times to get the final color and brightness balance.

Stage 3 - The Printing and Mounting Process

All of the pieces are printed on to special metallic paper which contains very small metal particles which reflect the light in a unique way. Once the image has been printed, it is then left to dry and flattened. We only mount the images using a process known as face mounting. This technique is extremely difficult to master let alone find anybody that is able to do it. It is for this reason that this process is only performed in house by the photographer himself. It involves coating the printed image in an optically clear, double sided adhesive in a completely dust free environment. The final part of the process is to the reverse bond this coated piece to a sufficiently thick piece of acrylic. The precision involved in doing this is almost like surgery. The slightest mistake can result in air bubbles, non-adhesion and ultimately a ruined print and piece of acrylic. That said, the finished result is like nothing else, providing an almost three dimensional quality the literally glows. Because this process results in a completely smooth mount, the print takes on a unique quality which is lost when using traditional mounting techniques that typically standard framers would use. For a contemporary look, we use 1/4 inch acrylic which is highly polished at the edges which gives off a unique light reflection. If the piece is to be framed, we will face mount to a 1/8 inch acrylic as the rigidity will be provided by the frame. The process also completely seals in the print from any moisture, air or harmful UV rays. Providing it is cared for, it will last almost indefinitely.

Glowing and Reflective Properties

By using a metallic based paper for the print, the tiny metal particles within the paper catch the light in a completely unique way. When you couple this process to the face mounting a certain magic happens which greatly enhances the colors and richness of the piece. It also makes it ultra smooth which creates the illusion of the piece being self lit. It is similar to putting a lovely gloss varnish on a piece of wood. The video to the left goes some way to showing off the final effect, however, it is a hard phenomena to capture and is always best seen in person to fully appreciate.

Unprecedented Detail

The enormous resolutions involved in these images allows for extremely lifelike detail. Whether framed or unframed (as in the video on the right) the finished look is extremely contemporary but yet fits in well with many types of decor


(c) 2022 Crawshay Gallery / Number 6 Consulting LLC / Phil Crawshay, All rights reserved.

The Crawshay Gallery of Fine Art, Large Format Photography

Sitemap of photography